Turn an aluminum can into garden art! Follow these simple steps to make a flower our of an aluminum can!
Materials Needed
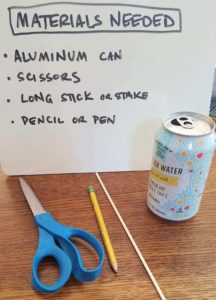
- One Aluminum Can
- Scissors
- Long Stick or Stake
- Pencil or Pen
Procedure
1. With help from an adult, puncture a hole in the can and then cut the top off like in the picture shown. Save this part that was cut off for step 5.

2. Cut the “petals” by cutting multiple slits from the opening at the top of the can to the bottom.

3. Fold the petals outward.

4. Using the pen or pencil, curl the petals like you would when curling a ribbon for a gift. The petals should now be bent towards the center of the can.

5. With the top of the can that you had cut off in step 1, cut the lid of the can away from the side that was still attached. But, be careful of the sharp edges! Set aside the long scrap piece, you will need it in step 7.

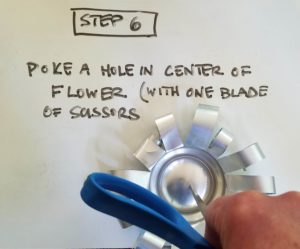
6. Poke a hole in the center of the flower (with one blade of the scissors).
7. Fold one end of the scrap from step 5 so it fits through the hole you just made.

8. Feed the scrap through the hole and bend it to lock it in place.

9. Wrap the remainder of the scrap piece tightly around your stick, and fold the stick down, this is the stem of the flower.

10. You can now stick it in the ground in your garden!

11. Send us a photo of your work or tag us on Instagram (@resources_protects)!